Workflow
To integrate ConnectWise with the Field Nation Platform:
Setting Up in Connectwise
You will need to create an API member or utilize a regular member for the connection.

The API Keys, regardless of membership, will be available in the tabs when going to Setting => Members
For the role, if possible it is recommended that you use the Admin role. If that is not possible, you should create a new role that has access to CWCompany, CWDocumentInfo, CWProject, CWScheduleEntry, and CWTicketNotes. We will also need access to the actual service ticket you create.
Setting up Template Ticket
We only have access to the Service Ticket for this integration. We cannot connect to any other object.
Please create a ticket that will serve as a template ticket. This template ticket should have access to all the custom fields you will want to utilzie in the integation.

Important: Please do not delete or alter the template ticket.
- Please be aware, the api DOES NOT allow us to perform POST or PUT requests from the initial description section through the API. This field cannot be used in the integration.
Setting up Callback
If setting a callback on the status, you can create this utilizing this CURL.
curl --location --request POST 'https://staging.connectwisedev.com/v4_6_release/apis/3.0/system/callbacks' \
--header 'Content-Type: application/json' \
--header 'clientId: e7415114-fb6b-470d-abc9-82b6c08124b5' \
--header 'Authorization: Basic XXXX' \
--data-raw '{
    "description": "FN-ATSE Callback to Integration board by status",
    "url": "https://micro.fndev.net/v1/broker-sandbox/inbound?client_token=XXXX&external_id=",
    "objectId": 69,
    "type": "ticket",
    "level": "status",
    "inactiveFlag": false,
    "isSoapCallbackFlag": false
}'
You will need to use the basic Auth in the headers which will be Username: Company + Public Key Password: Private Key
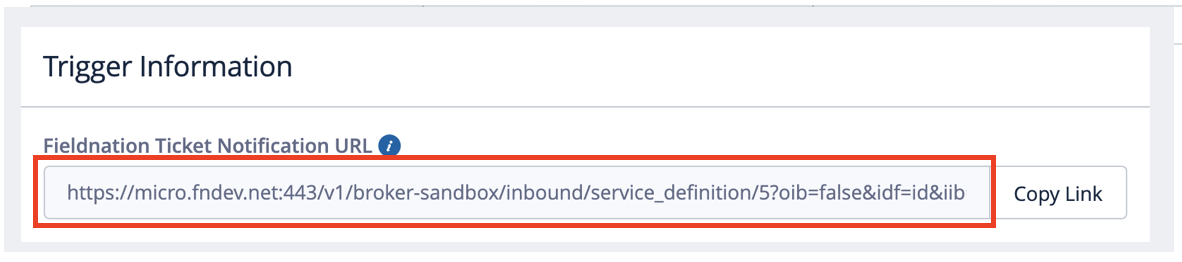
the URL will be the Trigger URL from the settings page in fieldnation with an added
&external_id=at the end.
- The Obejct ID will be the Status ID of the custom status you’ve created.